
GUIDE – LINKSYS SPA303, 502, 504, CONFIGURATION


SPA 303 has been shown as an example throughout this guide

Before You Begin
Before you begin the installation, make sure that you have the following Equipment and services:
- An active Internet account and Voice over IP account with Kiwi Internet
- Ethernet cable to connect to your broadband modem and this phone
- Phone cable to connect your phone
Below are detailed instructions on configuring the SPA 303 IP phone to work with Kiwi Internet:
NOTE: Please make sure you complete this set-up in a timely manner, otherwise when you are saving this set-up it will time out and all the settings we have inserted will be erased.
It is easy to follow the screen prints rather than the writing. The information in writing has been provided for users to understand what is going on and why particular settings.
Please find the screen print below to follow through easily.
1. Get access to your SPA-112 web interface
- Plug in Ethernet cable to router and wait for several seconds
- Accessing the SPA IP phone
First press the page tab on the front of the phone (It is beneath the envelope tab), this opens the set up menu in the display panel. Then press “9” and the display will show you the current IP address for the phone, ie 192.168.1.5
- Enter IP Address into your web browser (For example. http://192.168.1.10)
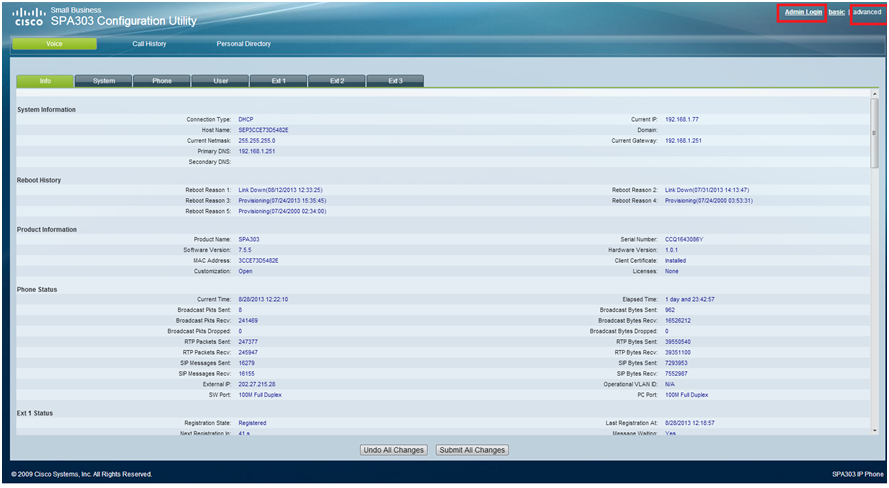
- You only need this number in the address panel to connect to the phone. Now you should see the User interface for your SPA303, now select “Admin Login” and then “Advanced” Now you can change your settings.
- You should now see the SPA IP Phone web Interface as below
2. Upgrade firmware (Compulsory)
First we recommend checking the firmware version and loading the latest firmware onto the phone if necessary:
- Visit http://software.cisco.com/download/find.html?q=&task=default&psaMode=AP
- Click on “Download Software”
- Select your VoIP Phone model
- Click on “IP Telephone Firmware”
- Select the latest release and download the Firmware ZIP file
- Open the ZIP file in a ZIP utility such as WinZip
- Click Extract and extract your files to a folder you choose (e.g. C:SPA303)
- Use Windows Explorer to open a window on your selected folder
- Click on the .exe Application
- Accept the warning and Click Continue
- Enter the IP Address of the SPA303 above into the Window and click OK
- Click Upgrade to update your SPA303 firmware to the new version you have downloaded
- Wait until the progress indicator has finished doing the upgrade. Do NOT unplug your SPA303 during the upgrade.
- When successfully upgraded you should see a message like ‘Your SPA has been successfully upgraded to the version shown below’ (Latest version at time of writing was 5.2.8a)
- Now in your web browser put in the SPA303 IP Address again and on the Info page you should see the new firmware version displayed beside ‘Software Version’
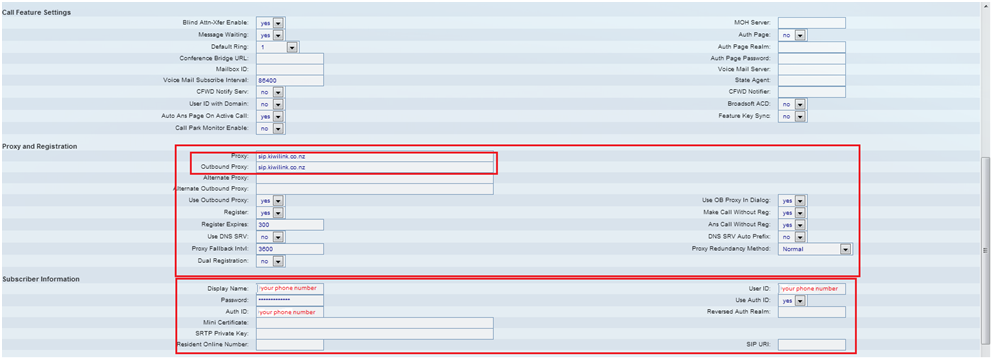
3. Configuring SPA 303 to work with Kiwi Internet Settings:
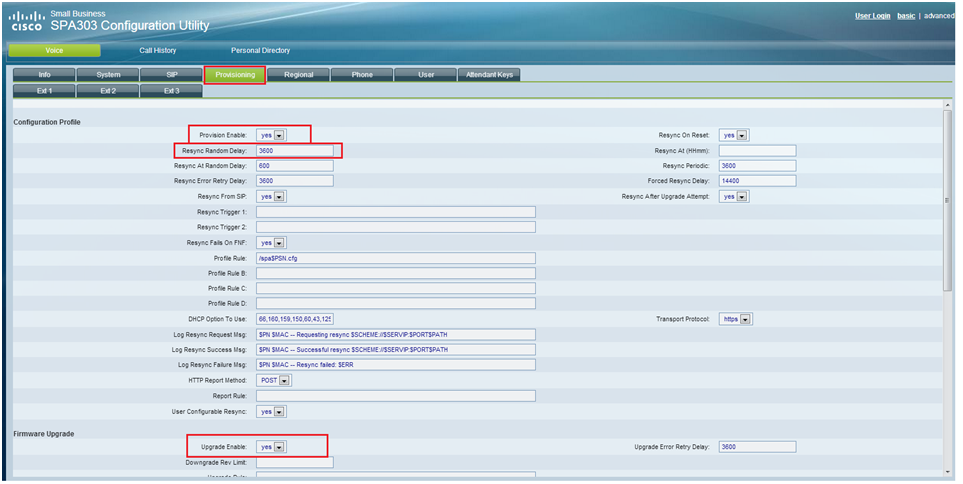
Click on Provisioning Tab
Configuration Profile:
- Provision Enable: Yes
- You will need have the resync Random Delay to: 3600 (as below)
- Upgrade Enable: Yes
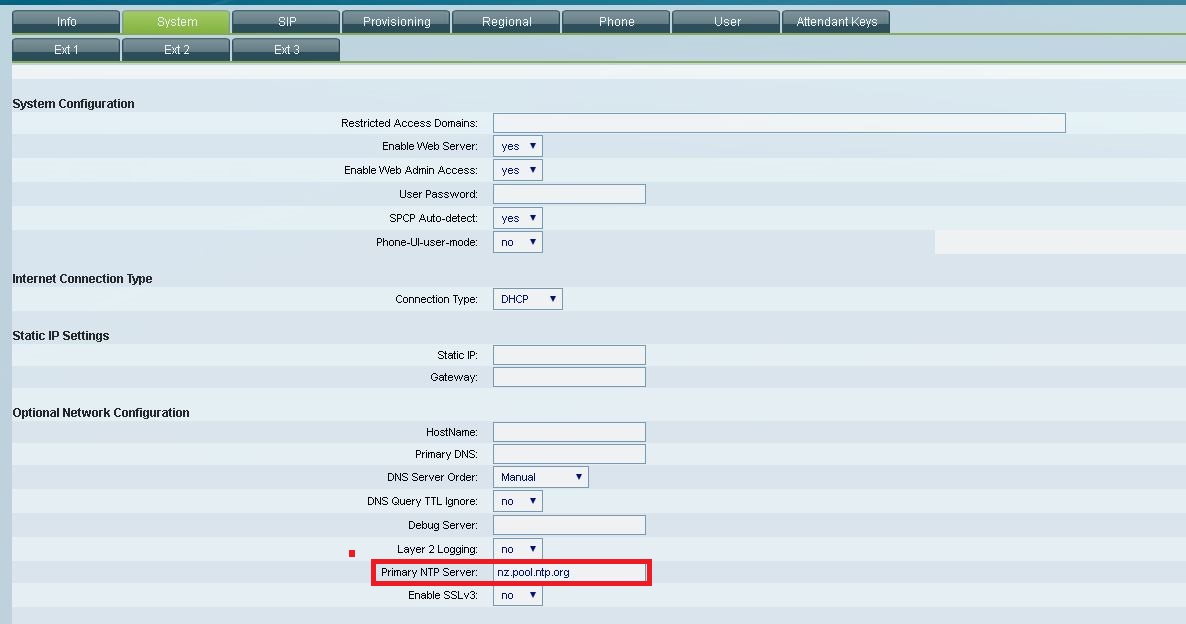
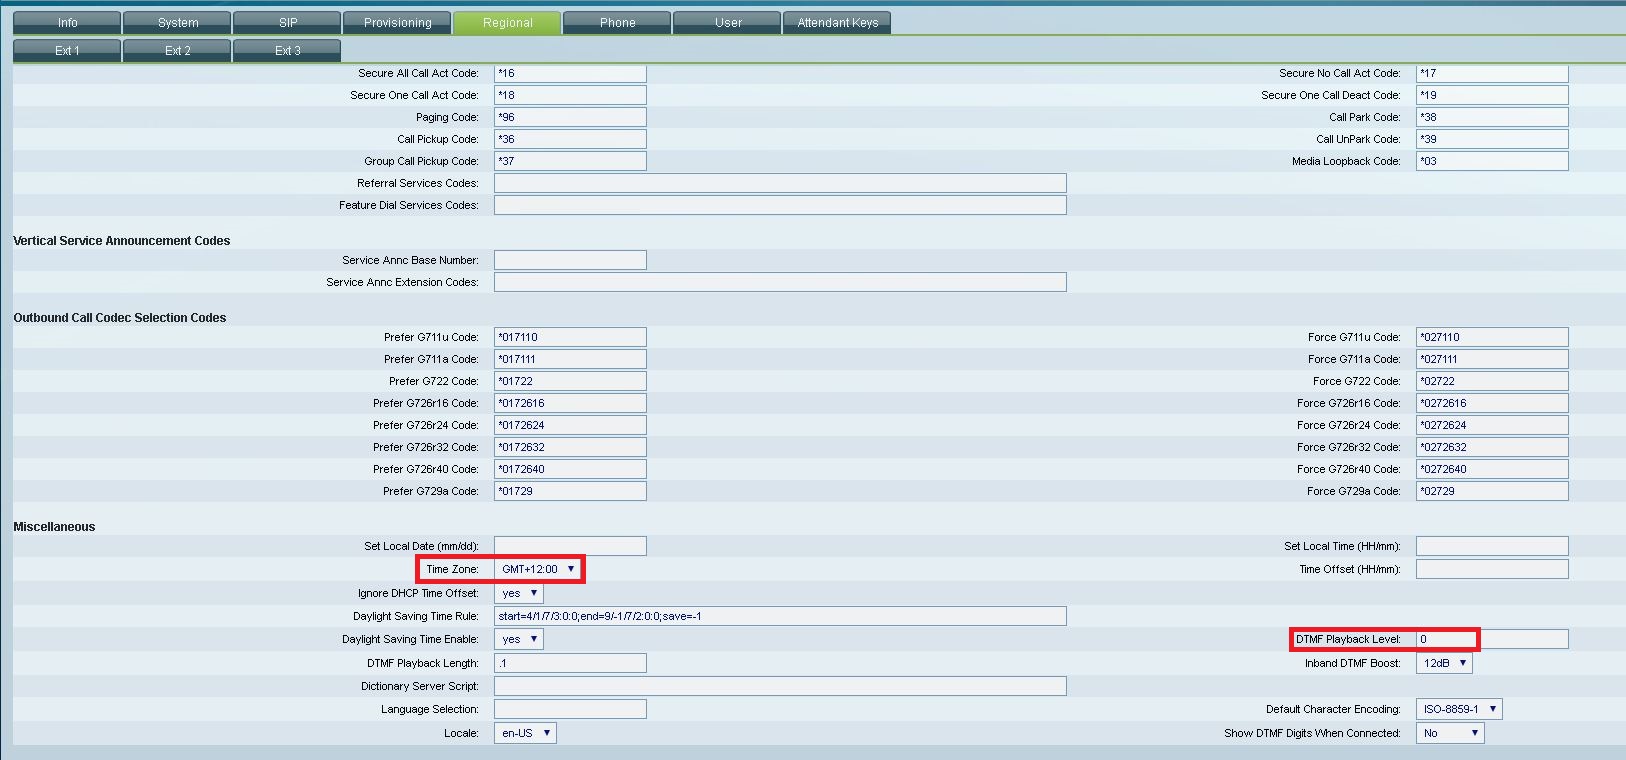
Regional
Miscellaneous
- Set Local Time (HH/mm): (Set current hour and minute)
- Time Zone: GMT+12
- Daylight Saving Time Rule: start=9/-1/7/2;end=4/1/7/3;save=1
- DTMF Playback Level: 0
- DTMF Playback Length: .1
Click on Phone Tab
The line keys should be assigned in ascending order with the optional station name.
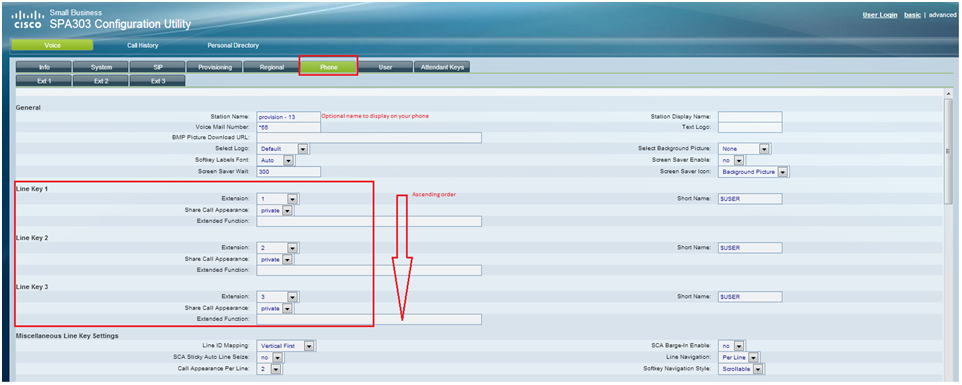
Configure each of your Lines by clicking on the ‘Ext1′, ‘Ext2’, ’Ext3’, ‘Ext4’ tabs
Dial Plan parameters: Below is the recommended dial plan you can use (copy and paste the Dial plan below).
New updated Dial Plan:
- ([2-9]xxxxxx|0[34679][2-9]xxxxxx|0210xxxxxxx|021[12]xxxxxx|021[3-9]xxxxx|02[0279]xxxxxxx|0204xxxxxxx|0240xxxxxx|024[1-9]xxxxxxx |0282[4-5]xxxxxx|050xxxxxxx|070xxxxxxx|080xxxxxxx|00xxxxxxx.|01[08]|017xx|12[356]|[19]11|*55|023xxxxxxxx|01[1234569]x.|02[56]x.|028[013456789] x.|0282[0123467890]|0282[01236789]|05[1-9]x.|08[1-9]x.|0[34679][0-1]x.|1[03456789]x.|11[023456789]x.|12[0124789]x.|*[012346789]x.|*5[012346789]x.)
Old Dial plan:
- (0[2-9][2-9]xxxxxx|[2-9]xxxxxx|90[1-8]|02x.|0508x.|0800x.|00x.|1xx|01x|*x.)
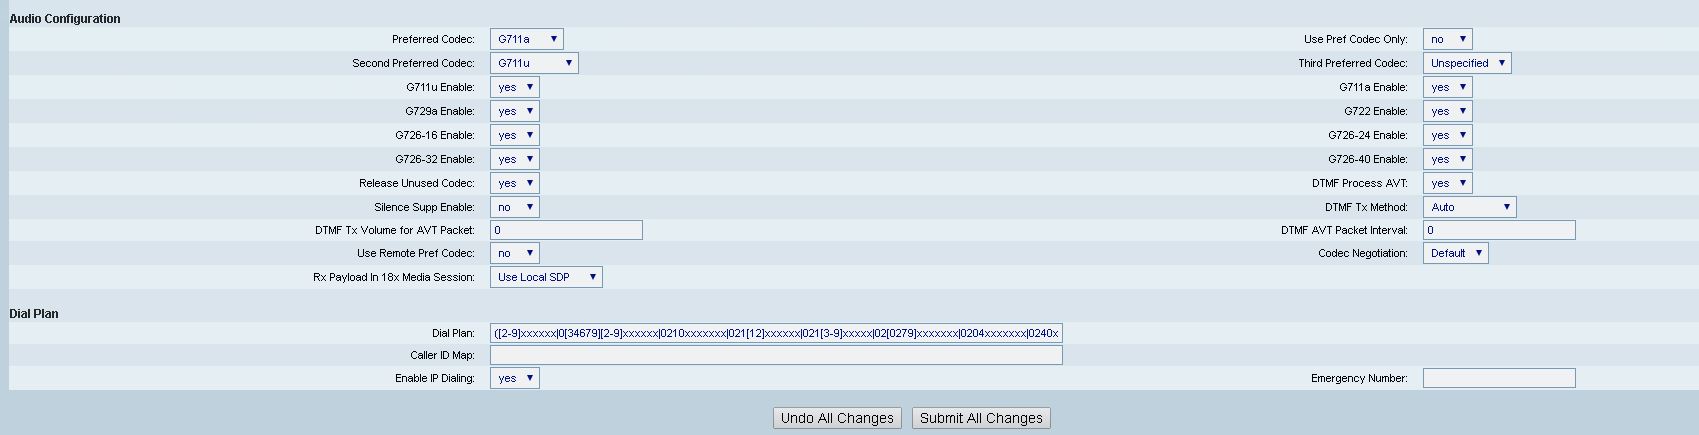
Most other settings are optional and up to your preferences. We have only highlighted the ones that are important.
Settings should be saved by clicking on “Submit”