
How to send a fax: To send a fax, send an e-mail to faxnumber@fax.kiwilink.net.nz (the fax number should be the number you are faxing). You will need to attach a PDF file which will be the fax message.
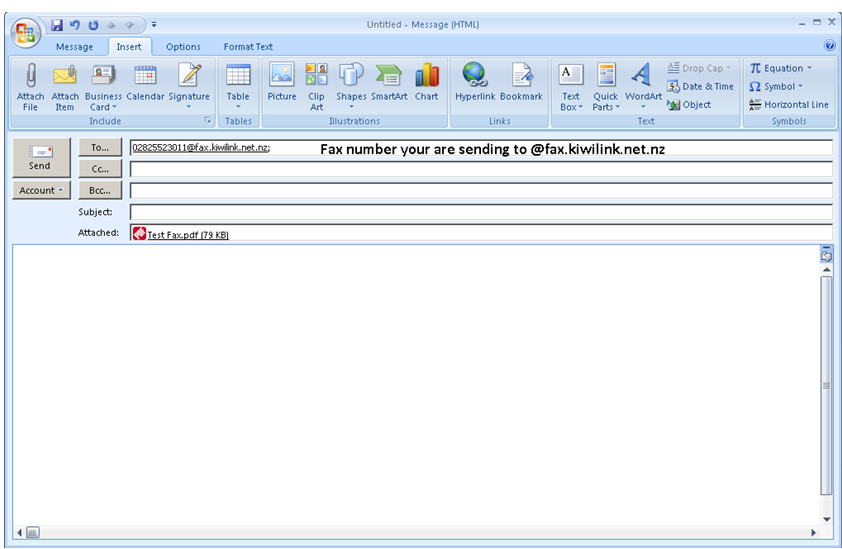
Fax Delivery: Faxes will automatically be sent to your e-mail address. Please see below for information on changing the e-mail addresses for sending and delivery.
To change your Kiwi Internet fax settings go to http://voip.kiwiinternet.co.nz.
- Username: Your fax number (including the area e.g. 09)
- Password: This has been sent to you.
Once logged in you will see the below screen. Please see below for an overview of each setting.
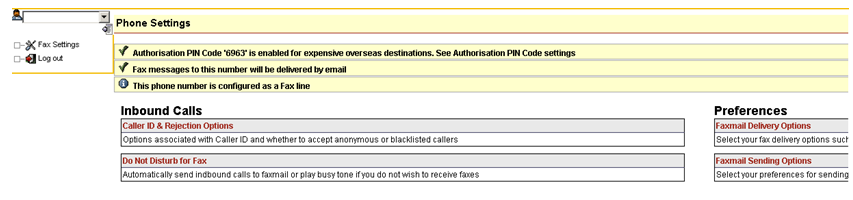
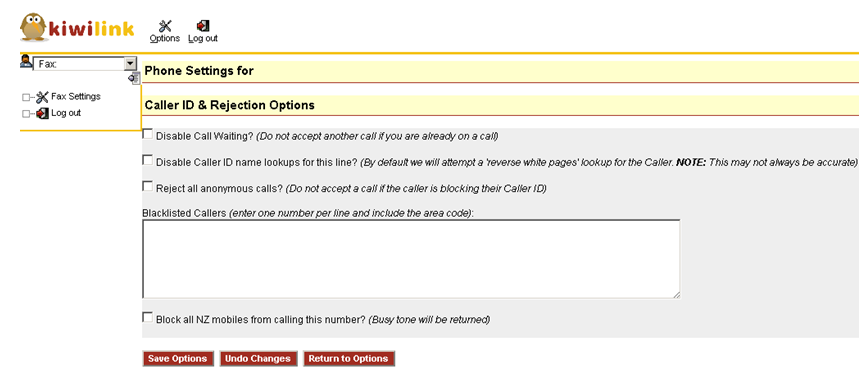
Caller ID and Rejection Options:
- Disable Call Waiting: Not necessary for fax.
- Disable Caller ID Name Look Ups: Disables Caller ID on this line. (Received faxes will not display who they are from).
- Reject All Anonymous calls: Blocks callers with blocked (private) caller ID.
- Blacklisted Callers: Enter numbers here that you wish to blacklist.
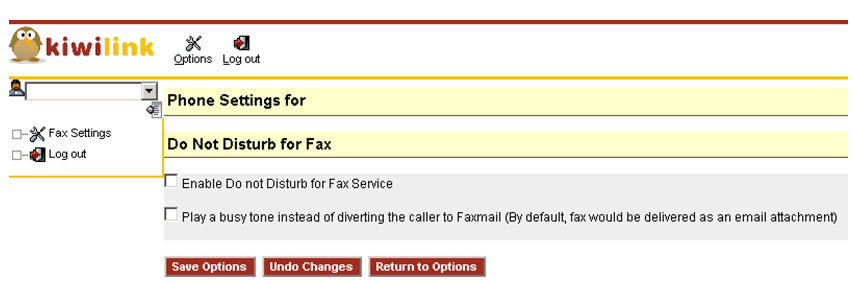
Do Not Disturb for Fax:
- Enable Do not Disturb: Disables your fax mail service
Fax Delivery Options:
- Select who should receive inbound fax mail messages: By default this is set to your account e-mail. If you would like to add more enter them in the box (separate each address with a new line).
- Select your preferred fax attachment format: Select your preferred format for faxes to be delivered as.
Fax Mail Sending Options:

- Allowed e-mail address: List the e-mail address you want to be used to send faxes.
- Optional Fax Verification Passphrase: If you wish to add extra security you can add a password, just include the password in the subject line when sending faxes.